On March 9th the Spring Forward Event took place in San Francisco. Apple announced a new Macbook and revealed some more information about the Apple Watch. The “most personal device” will be preorderable starting April 10th and will finally be available in the stores on the 28th of the same month.
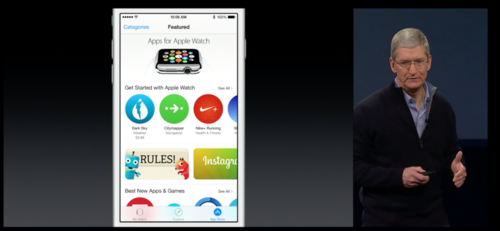
I’d like to talk about a single slide that Tim Cook showed during the presentation. The exact moment is at the minute 80.10 in the video:
Tim Cook was talking about the new Apple Watch companion app that shipped with iOS 8.2. Tim Cook said:
“This is the app where you see, browse and download apps.”
My reaction looked something like this:
YES. This is awesome and exactly what I was hoping for. Users will be able to check and download apps directly from the Apple Watch app. This feature prevents users from switching to the main App Store app and look for a specific category or use the already broken search engine to look for an Apple Watch app. Apple Watch owners are going to download more apps because they are just one tap away the store. New apps made specifically for the watch will be easier to discover.
Another positive point of this approach is that, as a developer, you don’t need to waste your 100 words keywords with generic terms like “apple watch”.
If an app contains a WatchKit extension, it will show up in both the App Store and the Apple Watch App Store. The app will be used to manage all the settings and apps too. There will be also how-to videos.
As you can see from the screenshot above, the icon can be different. The documentation says that the icon can be different from the containing app and you’ll upload it in iTunes Connect. You can’t submit WatchKit apps at this moment and it’s not clear when submissions will open yet.
In this first post, I’d like to explore a new feature which Apple introduced in WatchKit with iOS 8.2 beta 5: Settings Bundles.
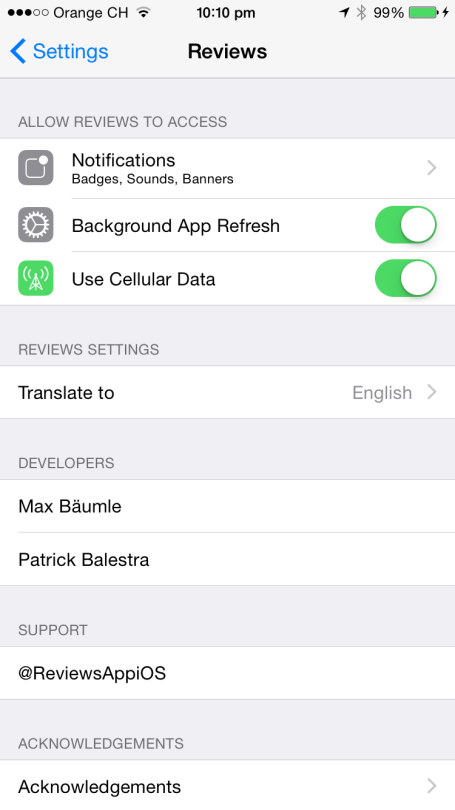
You may be familiar with them in iOS apps. Starting from iOS 8, every single app has its own place in the main Settings app as you can see from the following image. This is the screen showed by the Settings app for Reviews for iOS which contains a Settings bundle.
The first rows in top part of the screen are taken by the authorization and access requests required by iOS (such as notifications, location access, internet access, camera roll access). If your app contains a Settings bundle, iOS shows it just after the first section with your app’s custom preferences. In my case, I’ve added a preference to let users choose the default language along with some more information about the app.
Let’s switch over to WatchKit now where things are very similar. As you may know, the Apple Watch will begin shipping in April but we don’t know all the details yet. What we know though, is that Apple Watch users will install an official Apple Watch app that will manage the watch preferences. In Mark Gurman’s 9to5mac article, there are a few really interesting screenshots. It looks like the companion app is used to manage all the different settings from a single place. The cool thing is that Apple decided to let WatchKit developers add their settings into the same companion app too! A single place for everything!
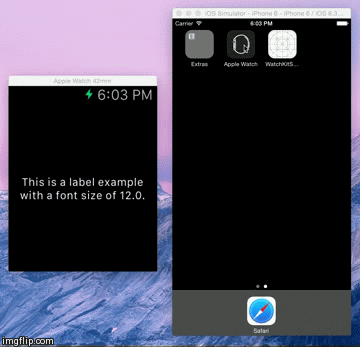
Xcode 6.2 beta 5 introduced a new app in the iOS Simulator, the Apple Watch app, which you can use to test Settings bundles.
Let’s start coding now. Enough words. I will show you how to create a WatchKit app that will change the font size of a label based on the user preference.
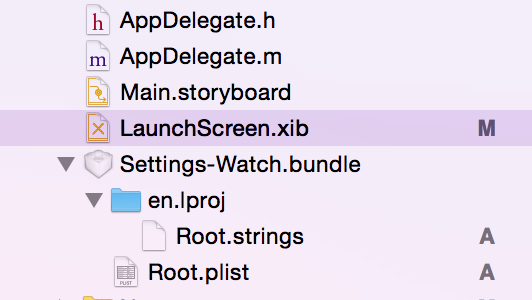
Create a new Xcode project and add a WatchKit target. Then do File → New and select the Apple Watch section on the left side. Choose a WatchKit Settings Bundle. Don’t change the default name from “Settings-Watch.bundle” and press Create.
A bundle will be added to the iOS target of your project. A Settings bundle has the .bundle extension and is composed by a main Root plist file which contains its structure. This is the main file of the bundle and where you’ll decide what to show in the Apple Watch companion app. It is localizable and so it contains a .strings file for every language you support where you can place your translations.
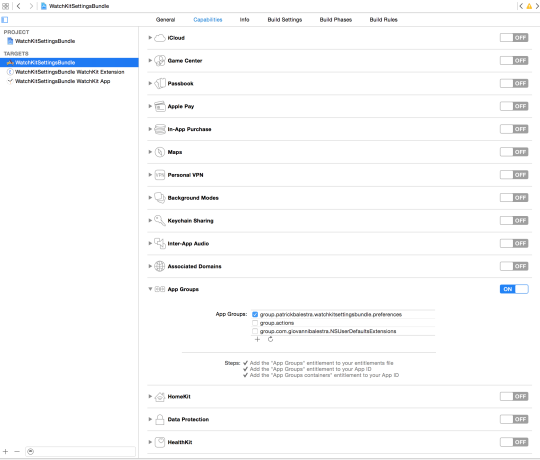
After adding the bundle, the first thing you need to do is to make sure your iOS app, your WatchKit app and the Settings bundle in the Apple Watch companion app will be able to share the same preferences. To do that, navigate under your main projects settings and select the Capabilities section at the top. Scroll down and turn on the App Groups capability. Choose a unique application group identifier to distinguish your preferences from the other apps. The identifier must start with “group” and it’s recommended to use the reverse-domain name style string. Something like “group.com.company.appname.settings” should be fine. If Xcode loves you back, it will automatically add the entitlement to your App ID in the developer portal. The following image should be the result.
Now do the same thing but this time select the WatchKit app target and turn on the App Group capability and check the previously created group identifier.
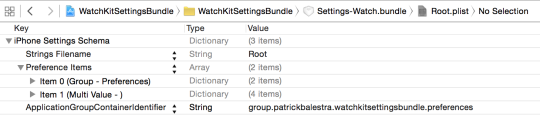
The next thing to do is to tell your settings bundle in which group to save the preferences. Open the Root.plist file and paste the just created identifier in the last row (which should have an empty value) of the plist with the key ApplicationGroupContainerIdentifier. Now the bundle knows where to save the preferences and you will be able to check them from your iOS app and WatchKit app whenever you need.
In the Root.plist file you need to structure your bundle. There are many different types of fields you can add. Here is the complete list.
Text field
Title
Toggle switch
Slider
Multi value
Group
Child pane
If you want to know more about each type of preference control, check the official documentation.
This part of the process really depends on your app’s preferences. You may prefer toggle switches over sliders or textfields. The process is basically the same for every type of value you want users to customize. More …