In this first post, I’d like to explore a new feature which Apple introduced in WatchKit with iOS 8.2 beta 5: Settings Bundles.
You may be familiar with them in iOS apps. Starting from iOS 8, every single app has its own place in the main Settings app as you can see from the following image. This is the screen showed by the Settings app for Reviews for iOS which contains a Settings bundle.
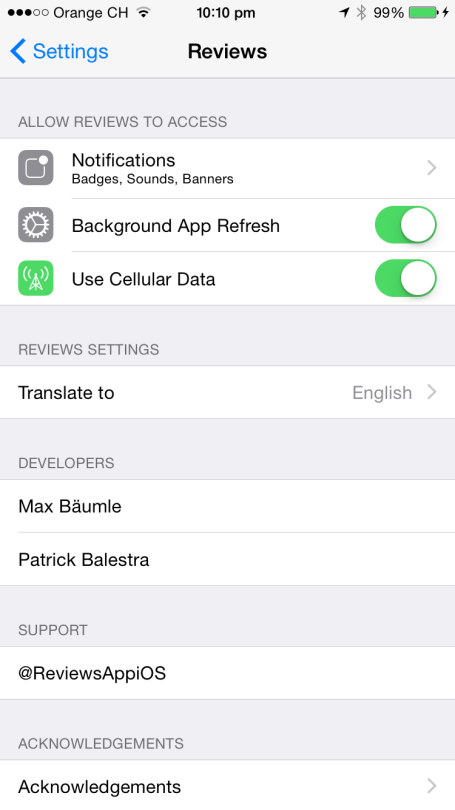
The first rows in top part of the screen are taken by the authorization and access requests required by iOS (such as notifications, location access, internet access, camera roll access). If your app contains a Settings bundle, iOS shows it just after the first section with your app’s custom preferences. In my case, I’ve added a preference to let users choose the default language along with some more information about the app.
Let’s switch over to WatchKit now where things are very similar. As you may know, the Apple Watch will begin shipping in April but we don’t know all the details yet. What we know though, is that Apple Watch users will install an official Apple Watch app that will manage the watch preferences. In Mark Gurman’s 9to5mac article, there are a few really interesting screenshots. It looks like the companion app is used to manage all the different settings from a single place. The cool thing is that Apple decided to let WatchKit developers add their settings into the same companion app too! A single place for everything!
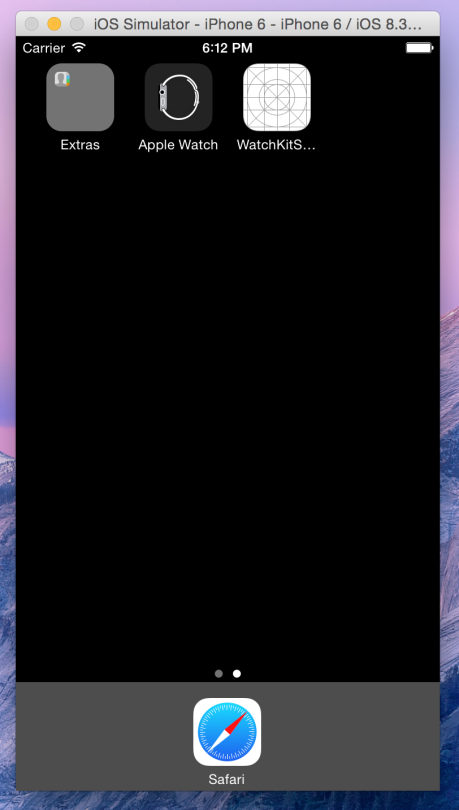
Xcode 6.2 beta 5 introduced a new app in the iOS Simulator, the Apple Watch app, which you can use to test Settings bundles.
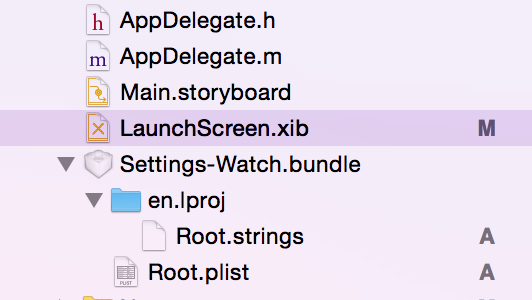
Let’s start coding now. Enough words. I will show you how to create a WatchKit app that will change the font size of a label based on the user preference. Create a new Xcode project and add a WatchKit target. Then do File → New and select the Apple Watch section on the left side. Choose a WatchKit Settings Bundle. Don’t change the default name from “Settings-Watch.bundle” and press Create.

A bundle will be added to the iOS target of your project. A Settings bundle has the .bundle extension and is composed by a main Root plist file which contains its structure. This is the main file of the bundle and where you’ll decide what to show in the Apple Watch companion app. It is localizable and so it contains a .strings file for every language you support where you can place your translations.
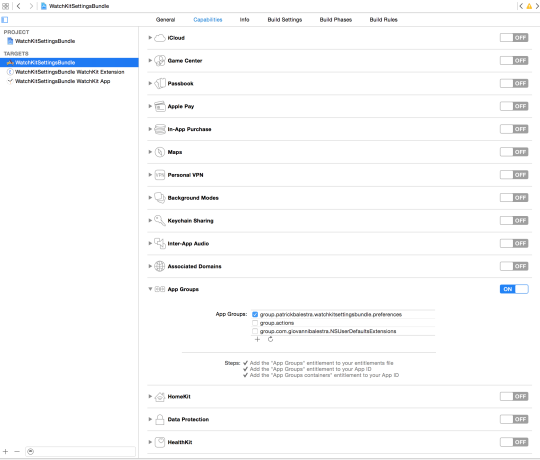
After adding the bundle, the first thing you need to do is to make sure your iOS app, your WatchKit app and the Settings bundle in the Apple Watch companion app will be able to share the same preferences. To do that, navigate under your main projects settings and select the Capabilities section at the top. Scroll down and turn on the App Groups capability. Choose a unique application group identifier to distinguish your preferences from the other apps. The identifier must start with “group” and it’s recommended to use the reverse-domain name style string. Something like “group.com.company.appname.settings” should be fine. If Xcode loves you back, it will automatically add the entitlement to your App ID in the developer portal. The following image should be the result. Now do the same thing but this time select the WatchKit app target and turn on the App Group capability and check the previously created group identifier.
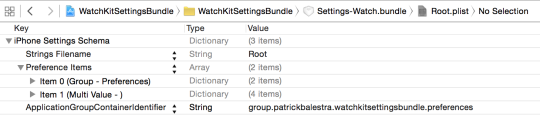
The next thing to do is to tell your settings bundle in which group to save the preferences. Open the Root.plist file and paste the just created identifier in the last row (which should have an empty value) of the plist with the key ApplicationGroupContainerIdentifier. Now the bundle knows where to save the preferences and you will be able to check them from your iOS app and WatchKit app whenever you need.
In the Root.plist file you need to structure your bundle. There are many different types of fields you can add. Here is the complete list.
- Text field
- Title
- Toggle switch
- Slider
- Multi value
- Group
- Child pane
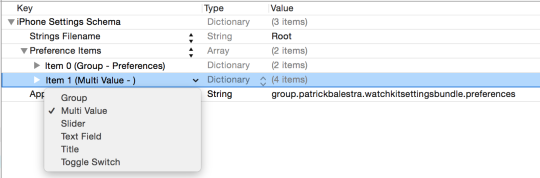
Start by deleting the items 1, 2, 3 that were automatically added by Xcode. The item 0 is the name of your first section. Expand it and change the Title value. After changing it in the Root.plist file, you must always remember to update the .strings with the corresponding word or translations. In this example, we will use a Multi Value control. To add a preference item, select the Preference Items row and press the + button that just appeared. You can now select which type of control you’d like to add and fill in the values.
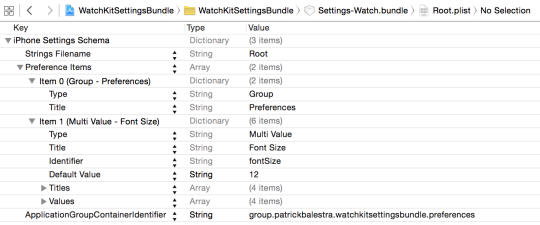
This is how my Root.plist file looks like in the end which shows the name of the section (Group - Preferences) and a Multi Value row.
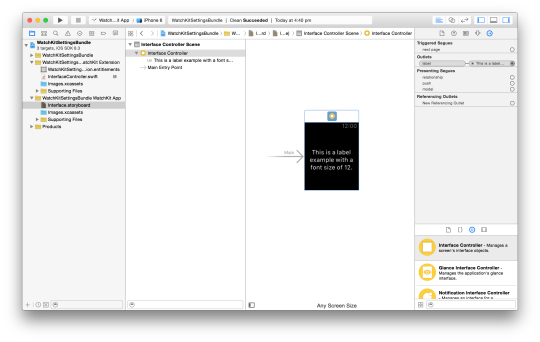
The first thing to do is to create the user interface of our WatchKit app in the Storyboard file. Add a label and create an outlet.
class InterfaceController: WKInterfaceController {

    @IBOutlet weak var label: WKInterfaceLabel!

    override func awakeWithContext(context: AnyObject?) {
        super.awakeWithContext(context)

        loadFontSize()
        NSNotificationCenter.defaultCenter().addObserver(self, selector: "loadFontSize", name: NSUserDefaultsDidChangeNotification, object: nil)

    }

    override func didDeactivate() {
        NSNotificationCenter.defaultCenter().removeObserver(self)
    }

    func loadFontSize() {
        let preferencesUserDefaults = NSUserDefaults(suiteName: "group.patrickbalestra.watchkitsettingsbundle.preferences")
        if let fontSizeString = preferencesUserDefaults?.valueForKey("fontSize") as? NSString {
            let fontSize = CGFloat((preferencesUserDefaults?.valueForKey("fontSize") as! NSString).floatValue)
            println(fontSizeString)
            let attributedString = NSAttributedString(string: "This is a label example with a font size of \(fontSize).", attributes: [NSFontAttributeName : UIFont.systemFontOfSize(fontSize)])
            label.setAttributedText(attributedString)
        }
    }

}
In the awakeWithContext method we subscribe to the NSUserDefaultsDidChangeNotification so we will be immediately notified when the user changes a preference. We use the loadFontSize method to load the value of the key “fontSize” and change our label font.
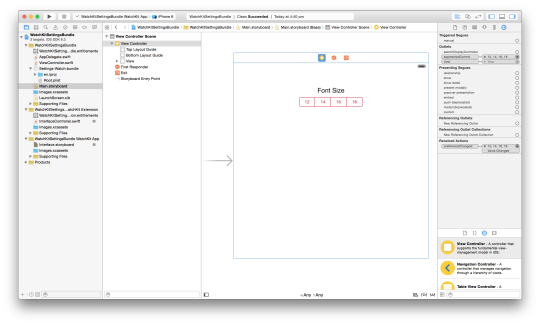
We can do the same thing in the iOS app. Open the Storyboard file and drag a UISegmentedControl and a static UILabel. Create an outlet and a Value Changed action to your ViewController.swift file for the UISegmentedControl object.
We now need to write the code which is similar to the one for the WatchKit side to sync the preferences and to allow users to change the font size directly from the our app.
class ViewController: UIViewController {

    @IBOutlet weak var segmentedControl: UISegmentedControl!

    override func viewDidLoad() {
        super.viewDidLoad()

        loadFontSize()

        NSNotificationCenter.defaultCenter().addObserver(self, selector: "loadFontSize", name: NSUserDefaultsDidChangeNotification, object: nil)

    }

    override func viewDidDisappear(animated: Bool) {
        NSNotificationCenter.defaultCenter().removeObserver(self)
    }

    func loadFontSize() {
        let fontSizes = ["12", "14", "16", "18"]
        let preferencesUserDefaults = NSUserDefaults(suiteName: "group.patrickbalestra.watchkitsettingsbundle.preferences")
        if let fontSize = preferencesUserDefaults?.valueForKey("fontSize") as? NSString {
            segmentedControl.selectedSegmentIndex = find(fontSizes, fontSize as! String)!
        }
    }

    @IBAction func preferenceChanged(sender: UISegmentedControl) {
        let preferencesUserDefaults = NSUserDefaults(suiteName: "group.patrickbalestra.watchkitsettingsbundle.preferences")
        preferencesUserDefaults?.setObject(sender.titleForSegmentAtIndex(sender.selectedSegmentIndex), forKey: "fontSize")
    }

}
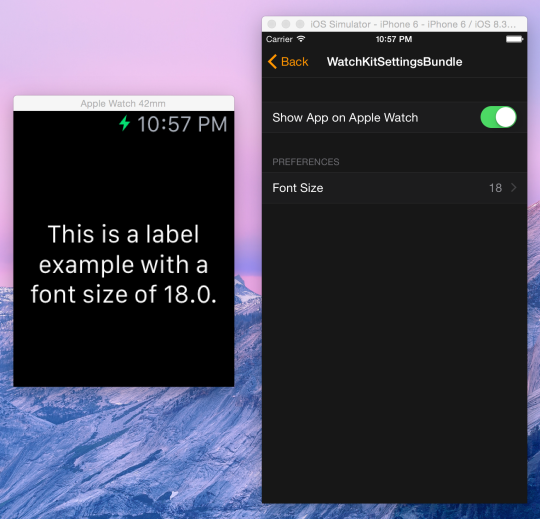
We now have a Settings bundle built-in the Apple Watch app and in our iOS app. Our WatchKit app is able to change the font size based on the user preference selected on the iPhone.
The complete project is available on GitHub.
If you have any questions or feedback, feel free to tweet me @BalestraPatrick.
Thanks for reading.