 Building your own dream custom light may seem daunting and time-consuming at first, but it’s actually pretty easy. In this post I’ll walk you through building your own floor lamp controllable via HomeKit and Alexa using off-the-shelf products.
The Why and What
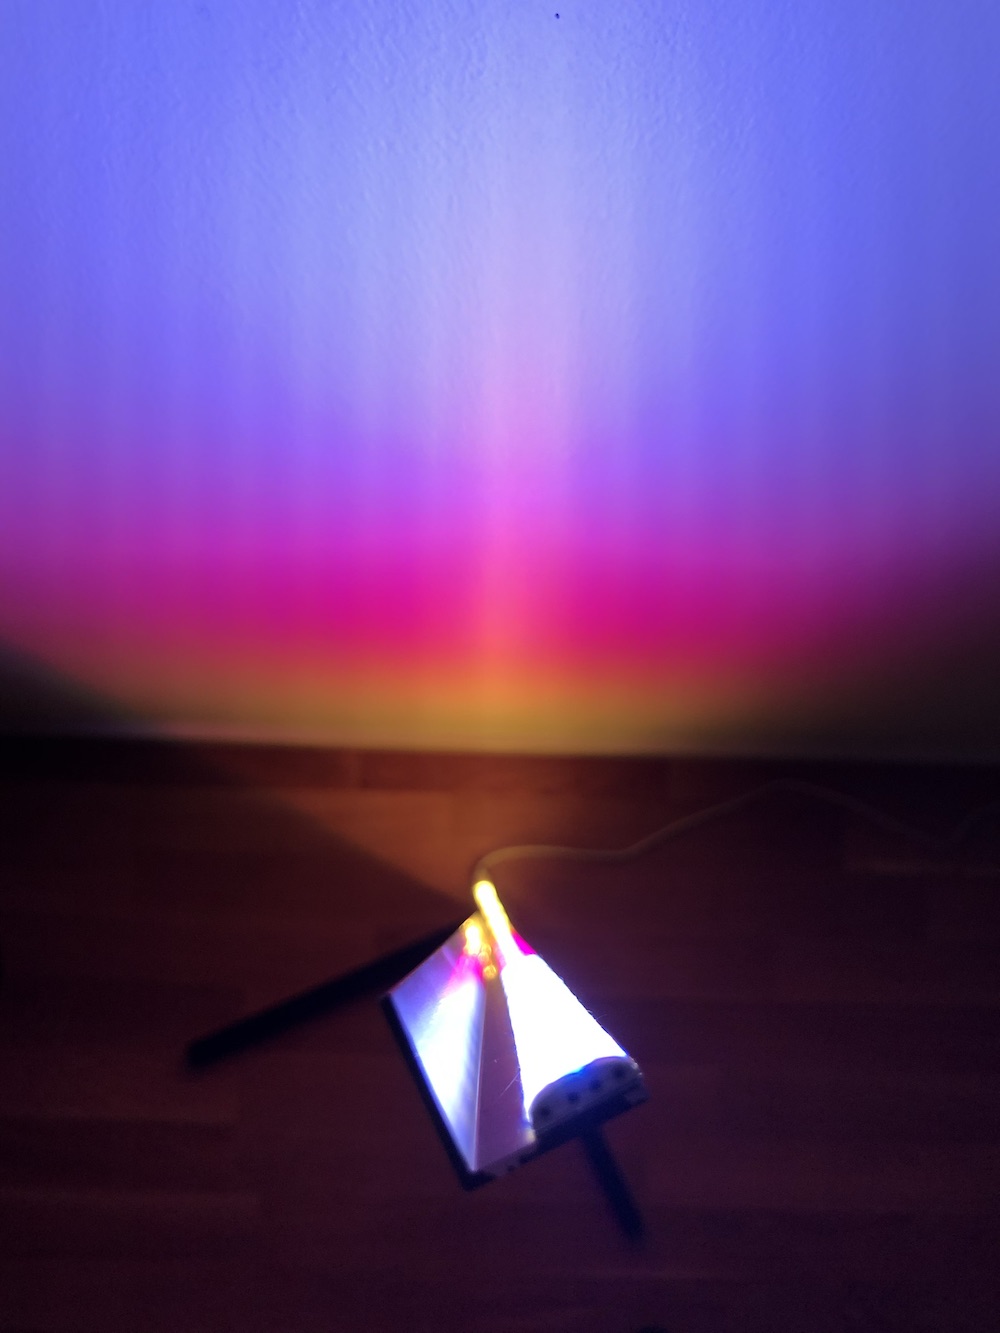
This cool-looking minimal lamp has been all over my Instagram and Facebook ads for the last couple of weeks, and it seems like I’m not the only one given my Twitter replies.
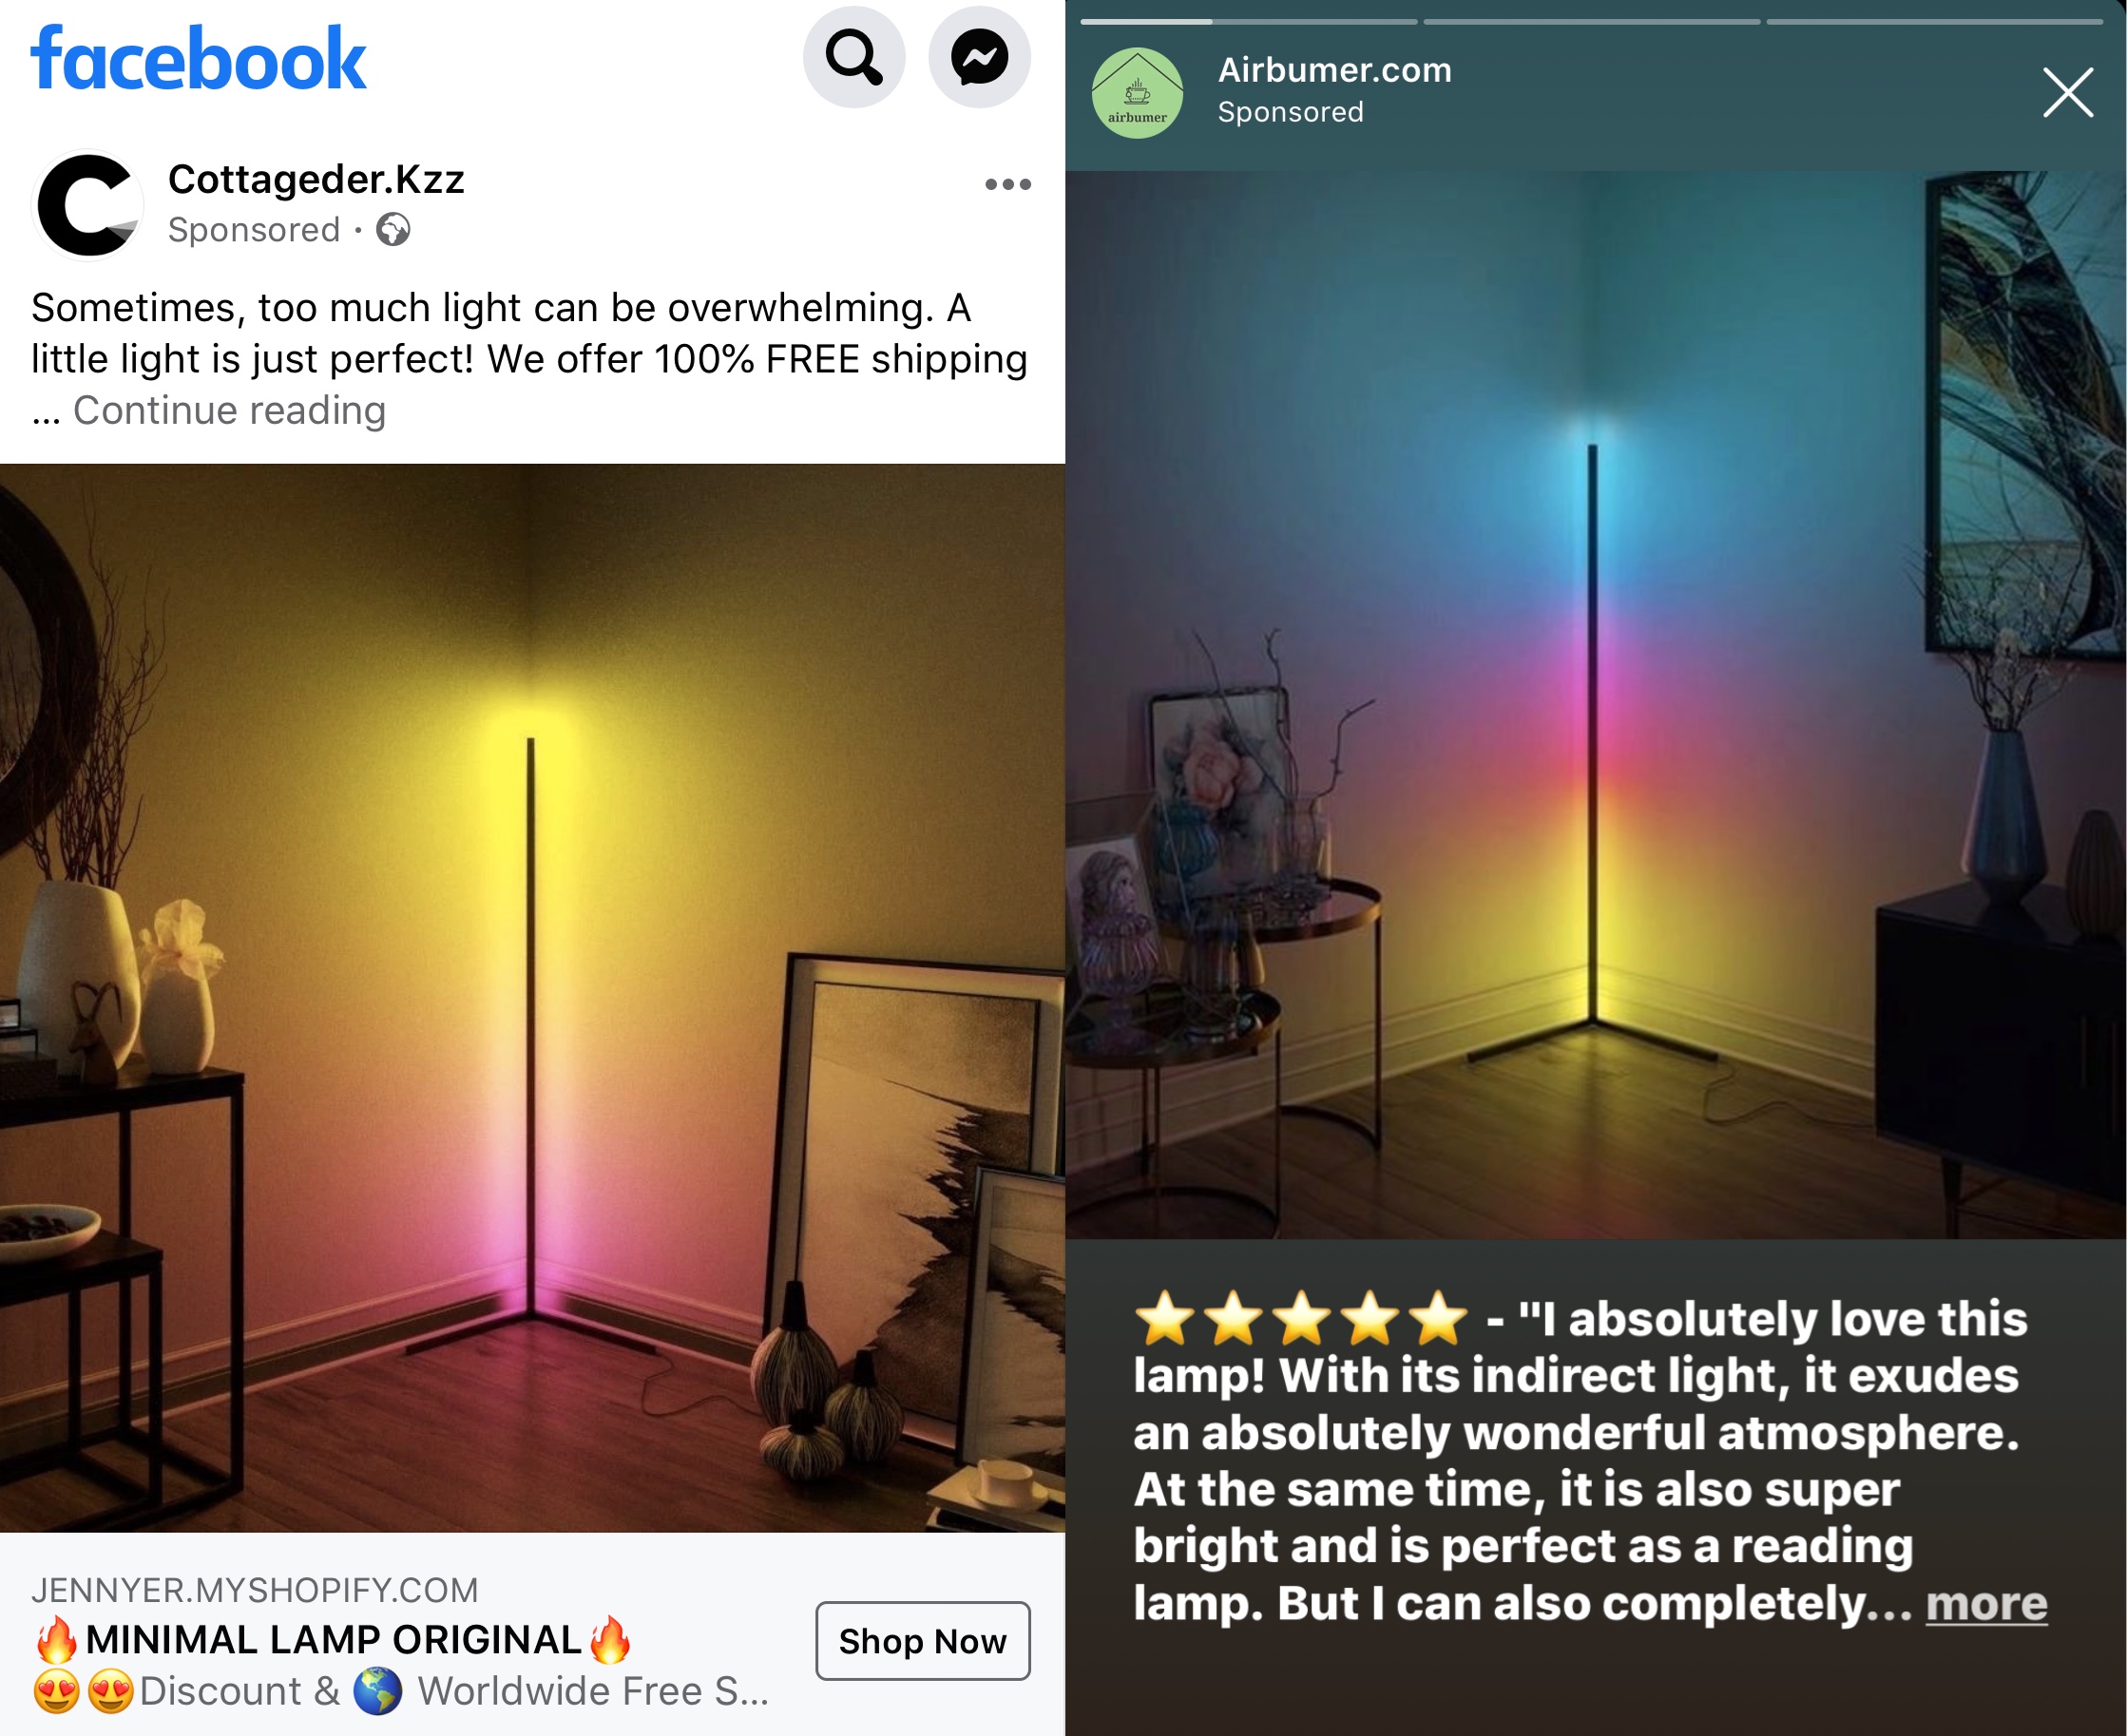 The Facebook ad has a lot of emoji, an all caps title, default Shopify domain and the original price was $199 but is now being sold at $99, how much can you trust it?
There are other similar lights that you can trust a bit more on the market, such as the Philips Hue Signe floor light which is $249, a bit too expensive for what it offers (single color and requires a Hue Bridge).
The Facebook ad has a lot of emoji, an all caps title, default Shopify domain and the original price was $199 but is now being sold at $99, how much can you trust it?
There are other similar lights that you can trust a bit more on the market, such as the Philips Hue Signe floor light which is $249, a bit too expensive for what it offers (single color and requires a Hue Bridge).
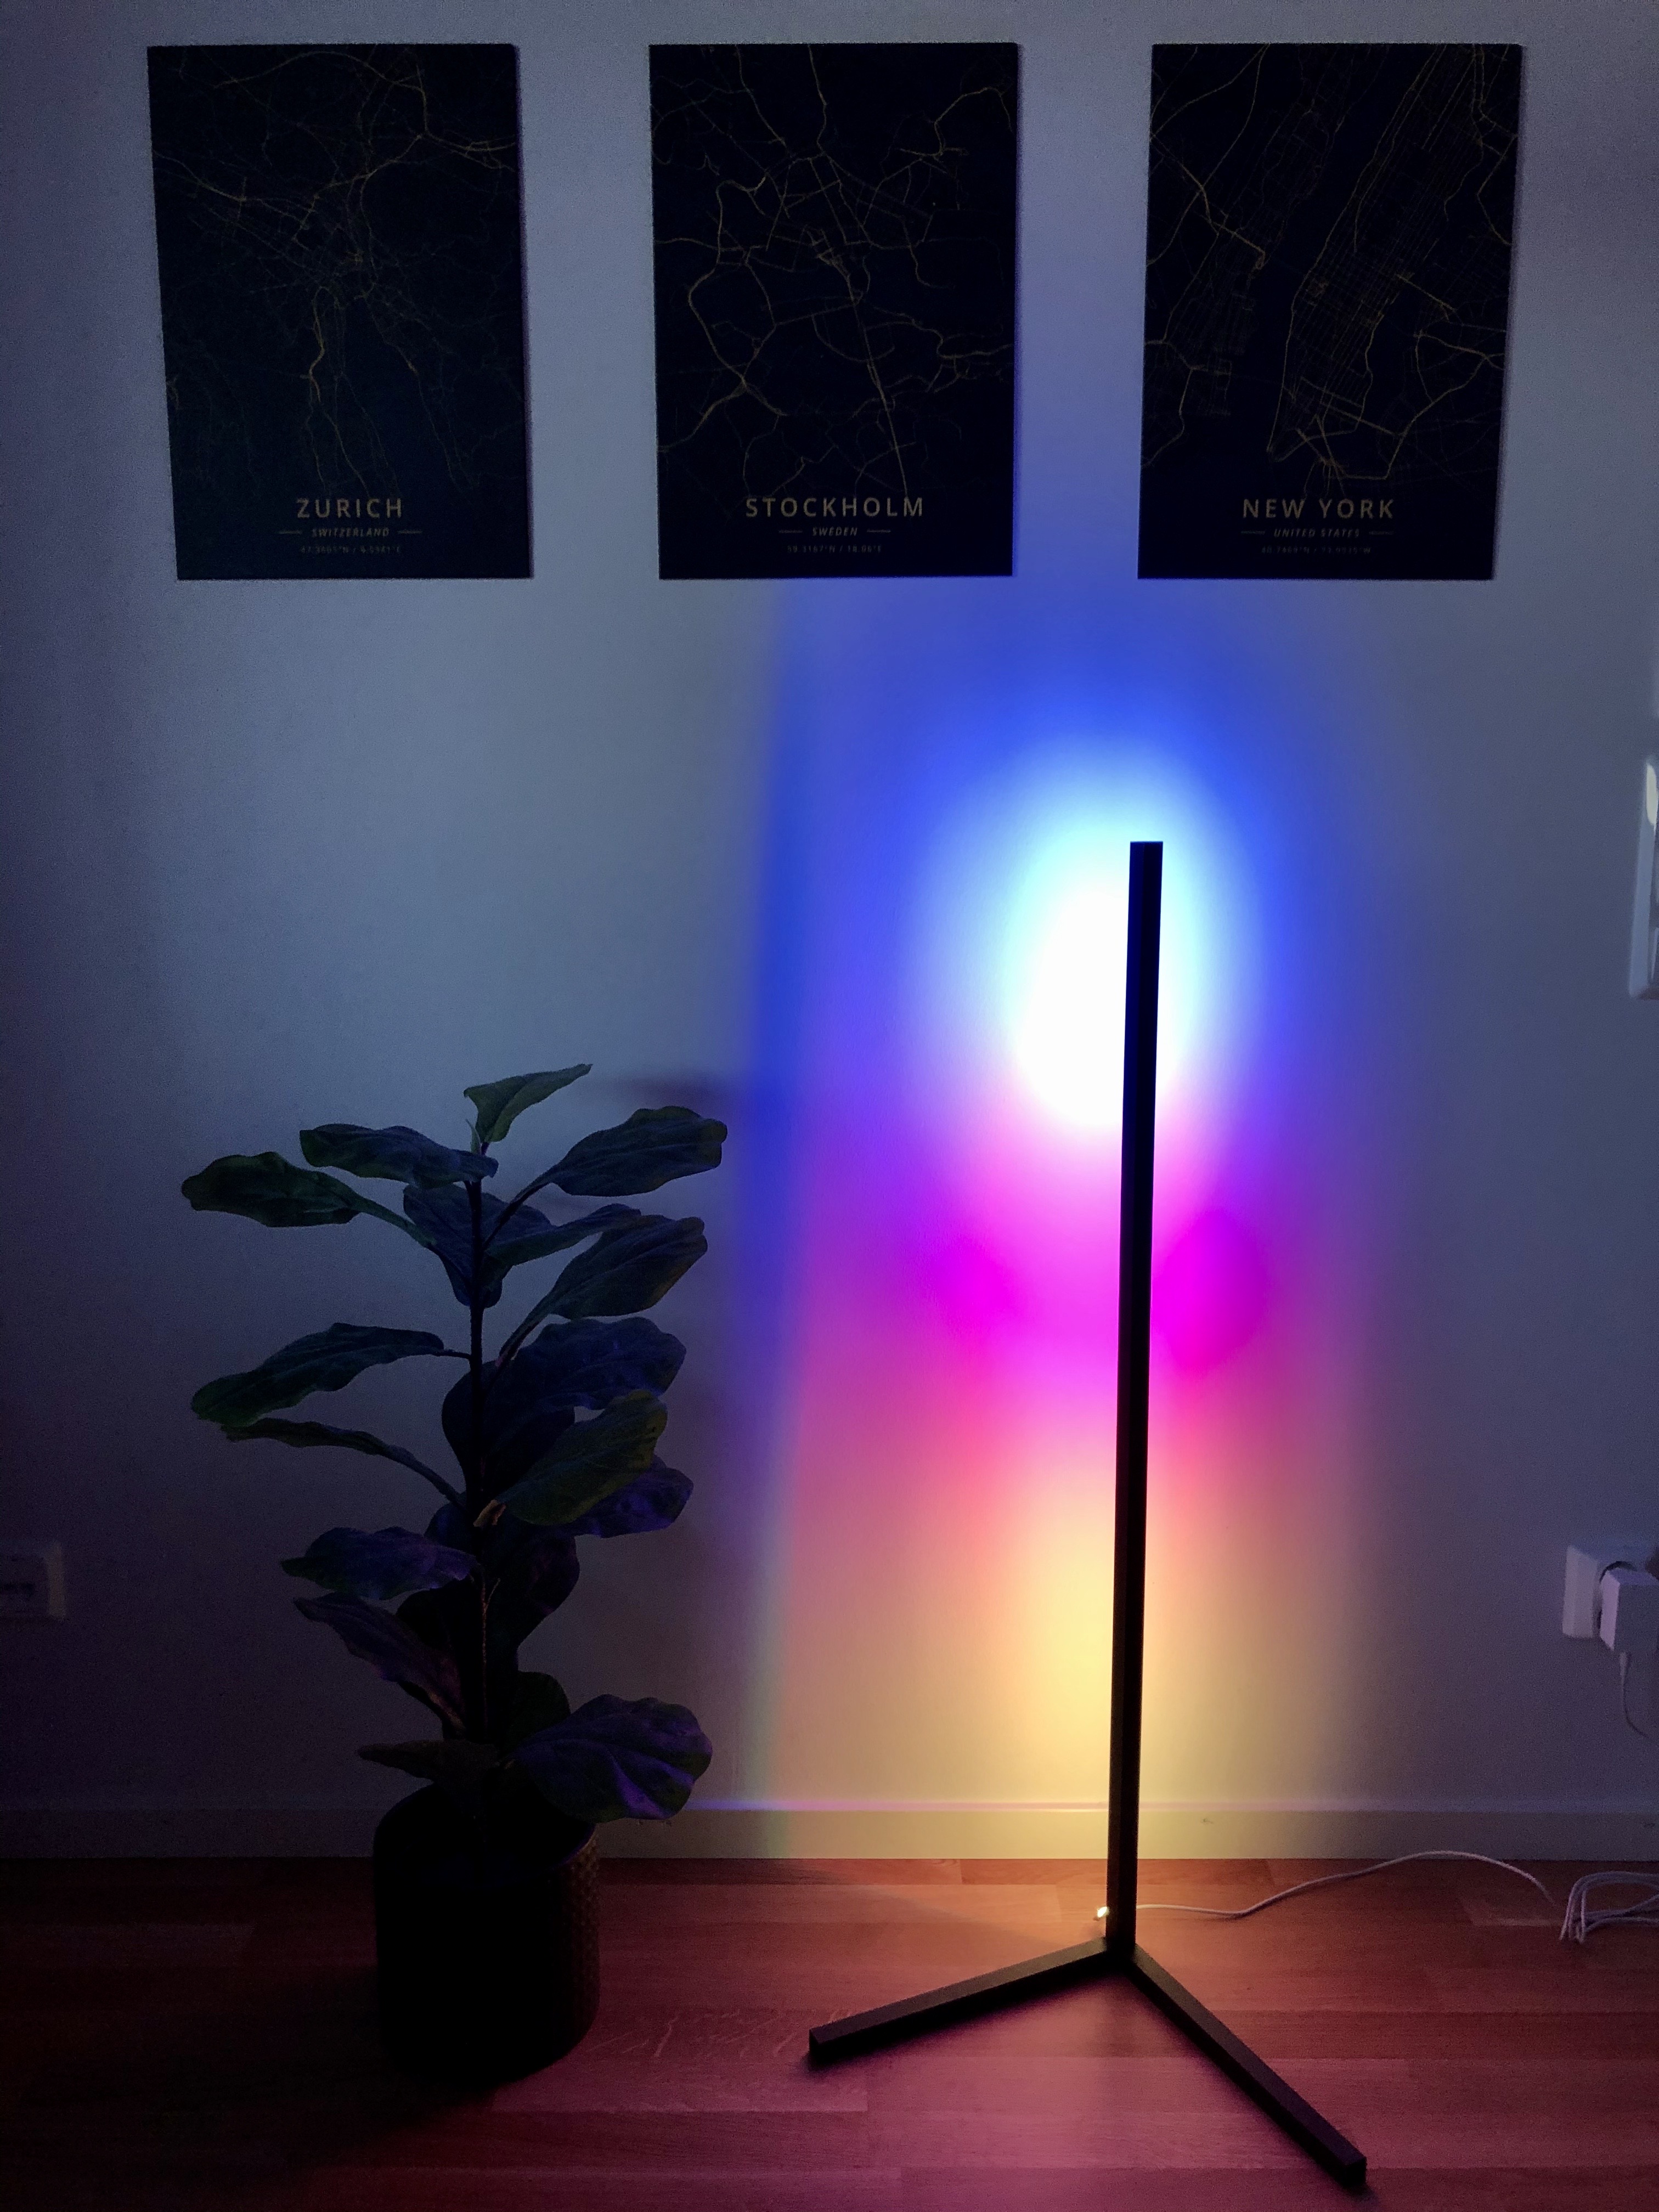
So I’ve decided to build my own. The goal was to keep the design very similar: a thin black structure and a multi zone LED strip lights attached to it that would project the beautiful colors on the wall. Of course HomeKit and Alexa controls were mandatory. It’s the perfect corner lamp for a living room.
I’m no expert in electronics, so I decided to go with product easily available to consumers. Therefore, this post should be pretty easy to follow and doesn’t require any particular tools or skills. I’ve used tools which you can easily find at your nearest home improvement shop.
What You Need
Here are the main parts that I’ve used:
- One aluminum squared pipe of length around 1 meter and 20mmx20mm thickness (Rör Fyrkantigt Aluminium 20X20X1,5mm 1M in Sweden). I ended up cutting this pipe to obtain two pipes of equal length. I wanted to find a pipe of size 15x15mm since that’s the width of the LED strip, but my local shop didn’t have it.
- One angle profile aluminum bar of length 1 meter (Vinkelprofil Aluminium 20x20x1,5mm 1M) that will be placed vertically and have the LED strip attached to it.
- A 90º profile connector with three couplings (Profilförbindare 90° Plast 20X20X1,5mm Svart).
- Super glue.
- Black color spray (Sprayfärg Halvblank Svart 400ML).
- LED strip that has multiple zones to allow assignment of different colors to different parts of the light. Most LED strips have a single color, but to give that cool effect in the picture you will probably need a more expensive light. It’s really up to you to decide which one to get. My apartment is completely on HomeKit/Alexa and it’s fully based on Philips Hue, but I choose to go with the LIFX Z LED Strip 1m Kit (“Z TV”). Its primary use is to be attached on the back of the TV to provide ambient light, but its length is also perfect for this kind of project.
The total cost of all the parts was around $100 in Stockholm, Sweden.
Putting Everything Together
The first part of the process consisted in cutting the long squared tube of alluminium into multiple pieces. I decided that my base should be 33cm per leg, so I cut the parts using the Vidga cutting box from IKEA I had lying around and a cutting saw.
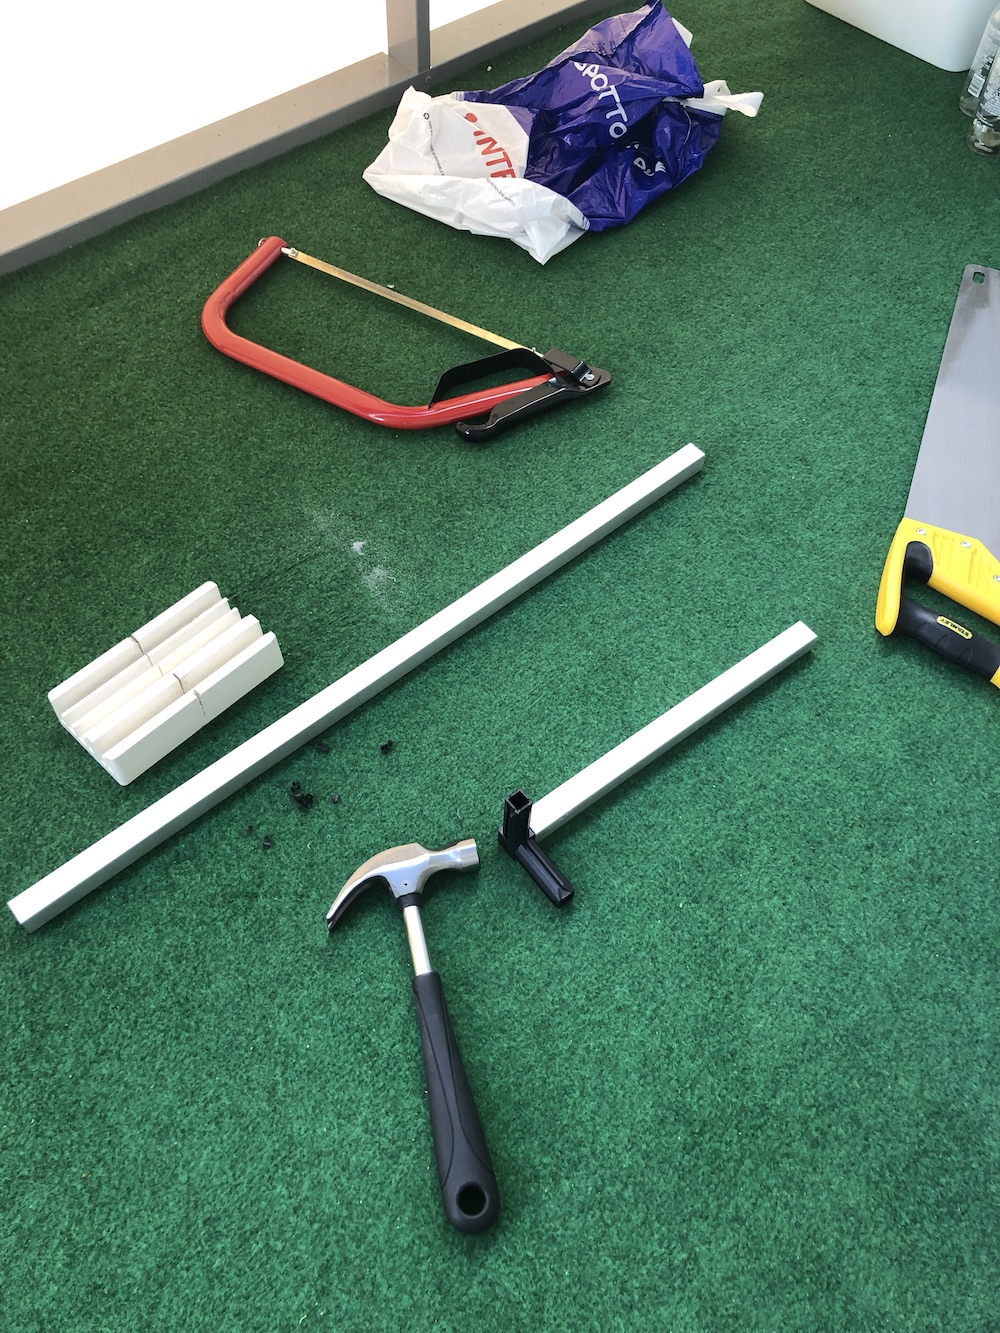
I then assembled the pieces with the profile connector using a hammer to fit them securely.
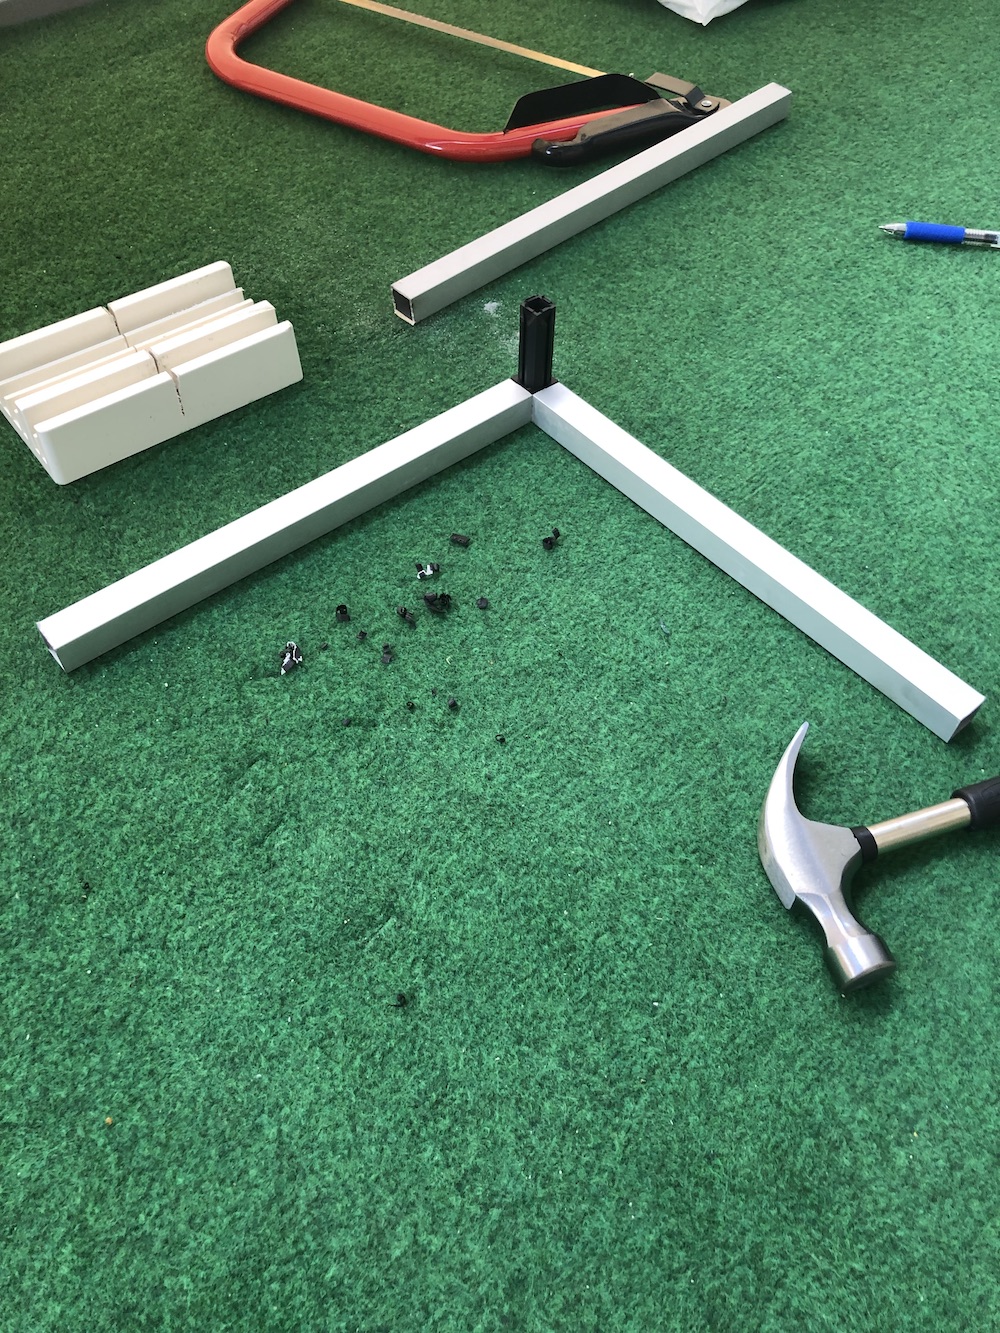
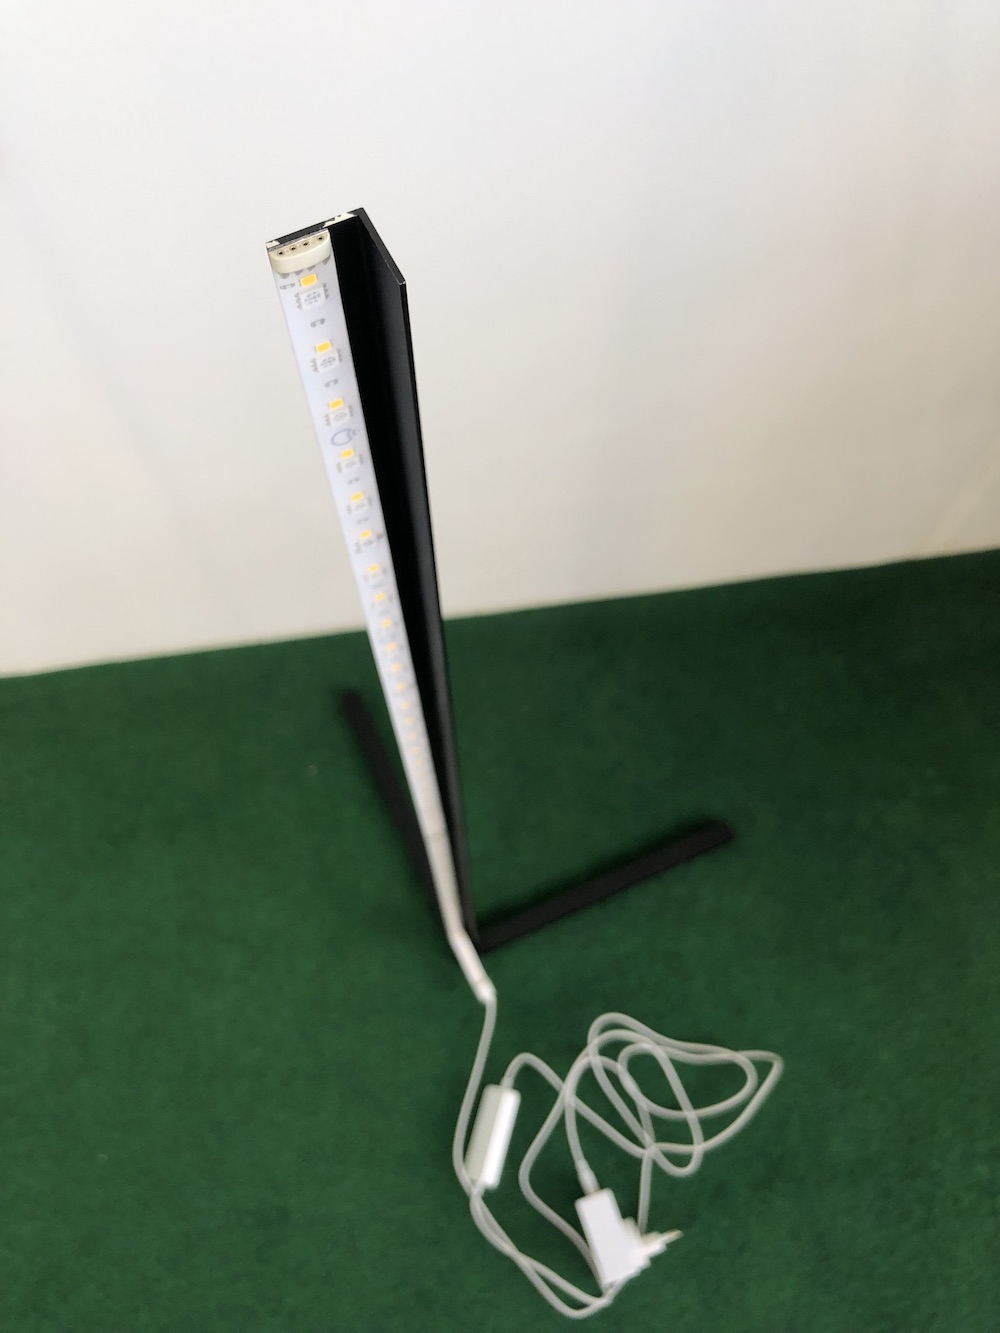
The top part was the most challenging. The initial idea was to go with the same square pipe which would fit perfectly in the profile connector, but I realized that I’d need to attach the LED strip on one side of the pipe, causing the light not to diffuse evenly on the wall.
Instead, by going with a angle profile and attaching the light on the border of one side, the light is more evenly distributed as you can see from this picture. It also depends on where you’re placing your light of course, but this should give you an idea of what to keep in mind.
I decided to use super glue to attach the vertical bar to the bottom of the base. It worked well and it seems to be pretty sturdy.

I then spray painted the structure in black and left it to dry for a couple of minutes. Make sure to follow the instructions of the spray paint you buy to avoid leaving visible stains or drops on the structure, for example by spraying too closely to the surface (been there, done that). Also, of course you should do the painting outside; this picture was taken after the fact.
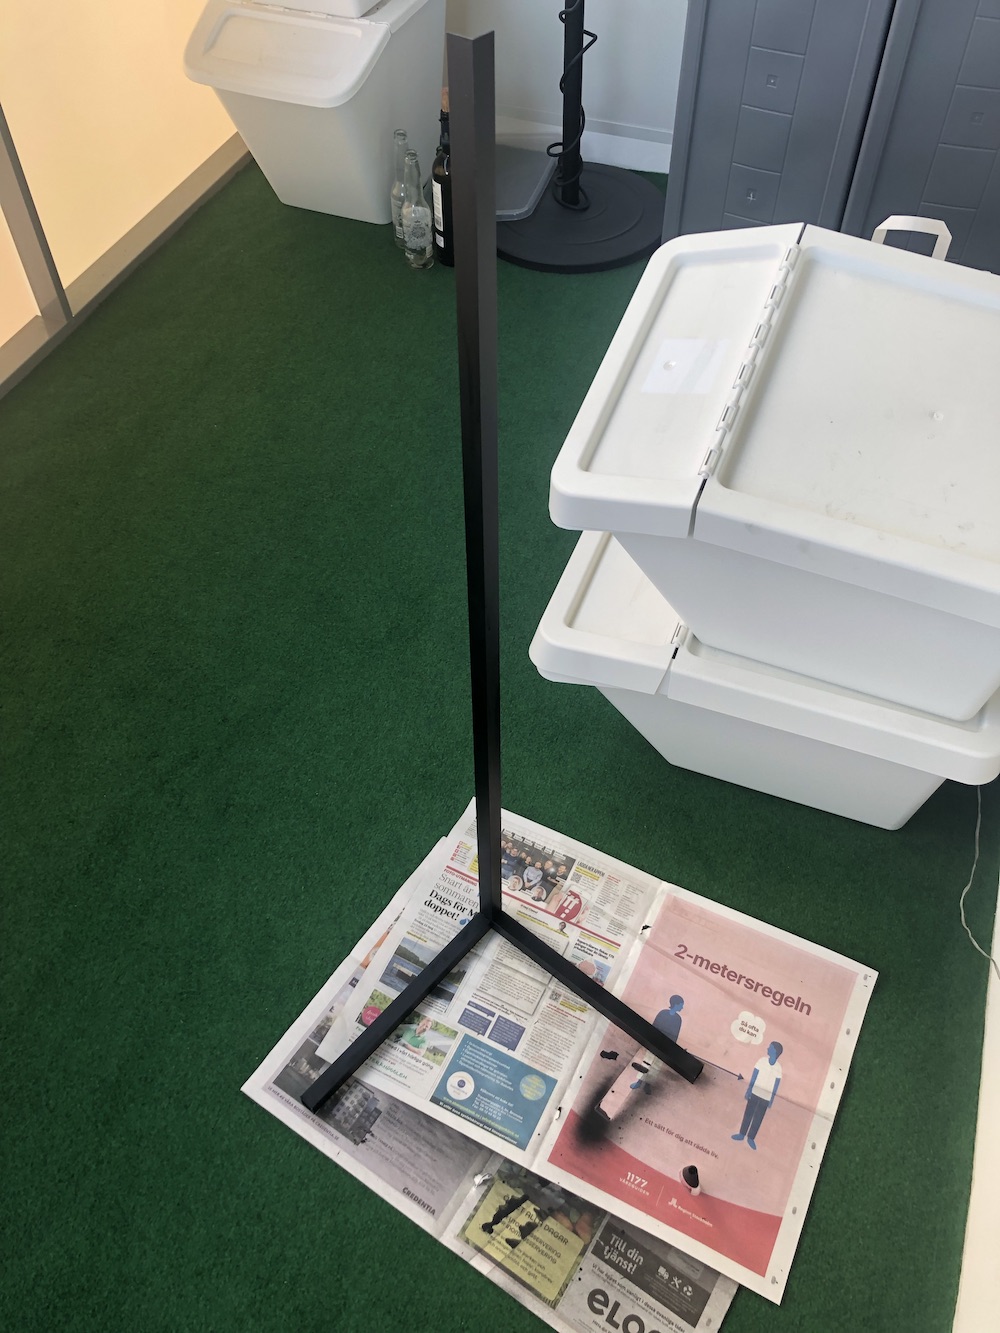
The structure is now complete!
Time to attach the LED strip. As mentioned before, try to evenly diffuse the light. I positioned the strip on the edge of one side of the angle profile bar. The strip has a pretty powerful sticker ready to be used, so this was easy.
The Tech Part
Downloading the LIFX app and setting it up in my HomeKit app was pretty straightforward. As most HomeKit accessories these days, you can pair them by just scanning the HomeKit QR code that comes with the product. My specific light directly connects to the home WiFi, no need for a hub. I was bit surprised when the app showed an error about “Unsupported router”. I have two WiFi connections, a 2.4 GHz and 5 GHz one. My iPhone was connected to the 5 GHz, which seems to be unsupported by the WiFi module of the light, so I had to switch to the 2.4 GHz to complete the configuration.
I was very surprised by the quality of the iOS LIFX app. It’s very well designed and has a ton of options to dynamically customize the colors and save them as scenes as you can see.
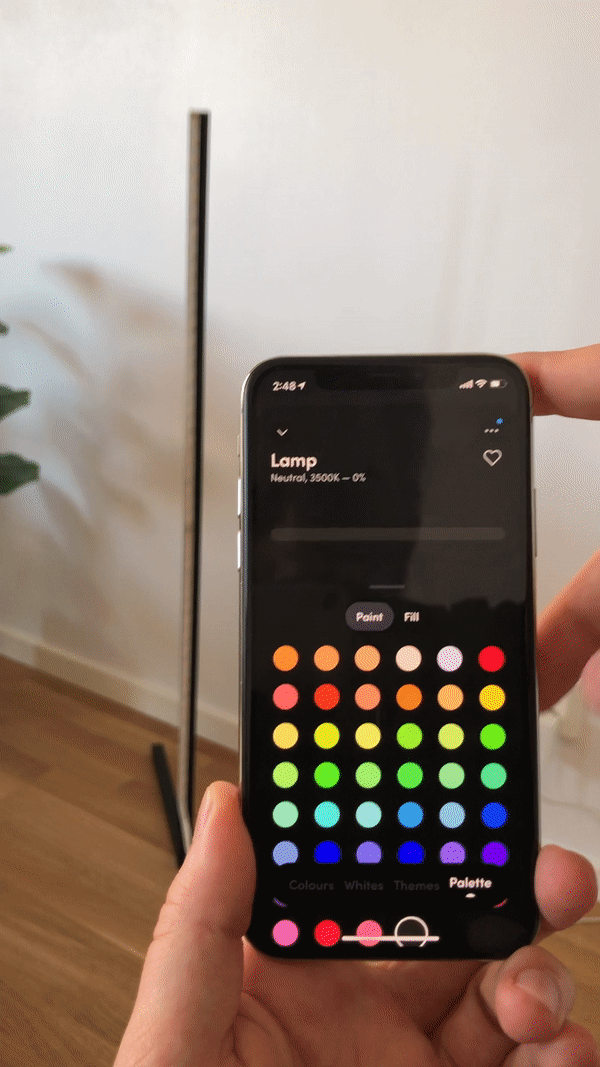
The app comes with a few built-in color themes, but it doesn’t have animatable patterns that change color over time for example. I might look into if this is possible by building a homebridge plugin and scheduling constant updates via HomeKit. Let me know if you’ve tried this already!
I hope this post was useful and it’ll encourage you to try and build more stuff yourself! 🛠
If you end up building your own version, make sure to tweet me a picture of it!
Thanks to Alex for proofreading this post and to Majd for helping me in finding the right components to buy by translating them to Swedish.